
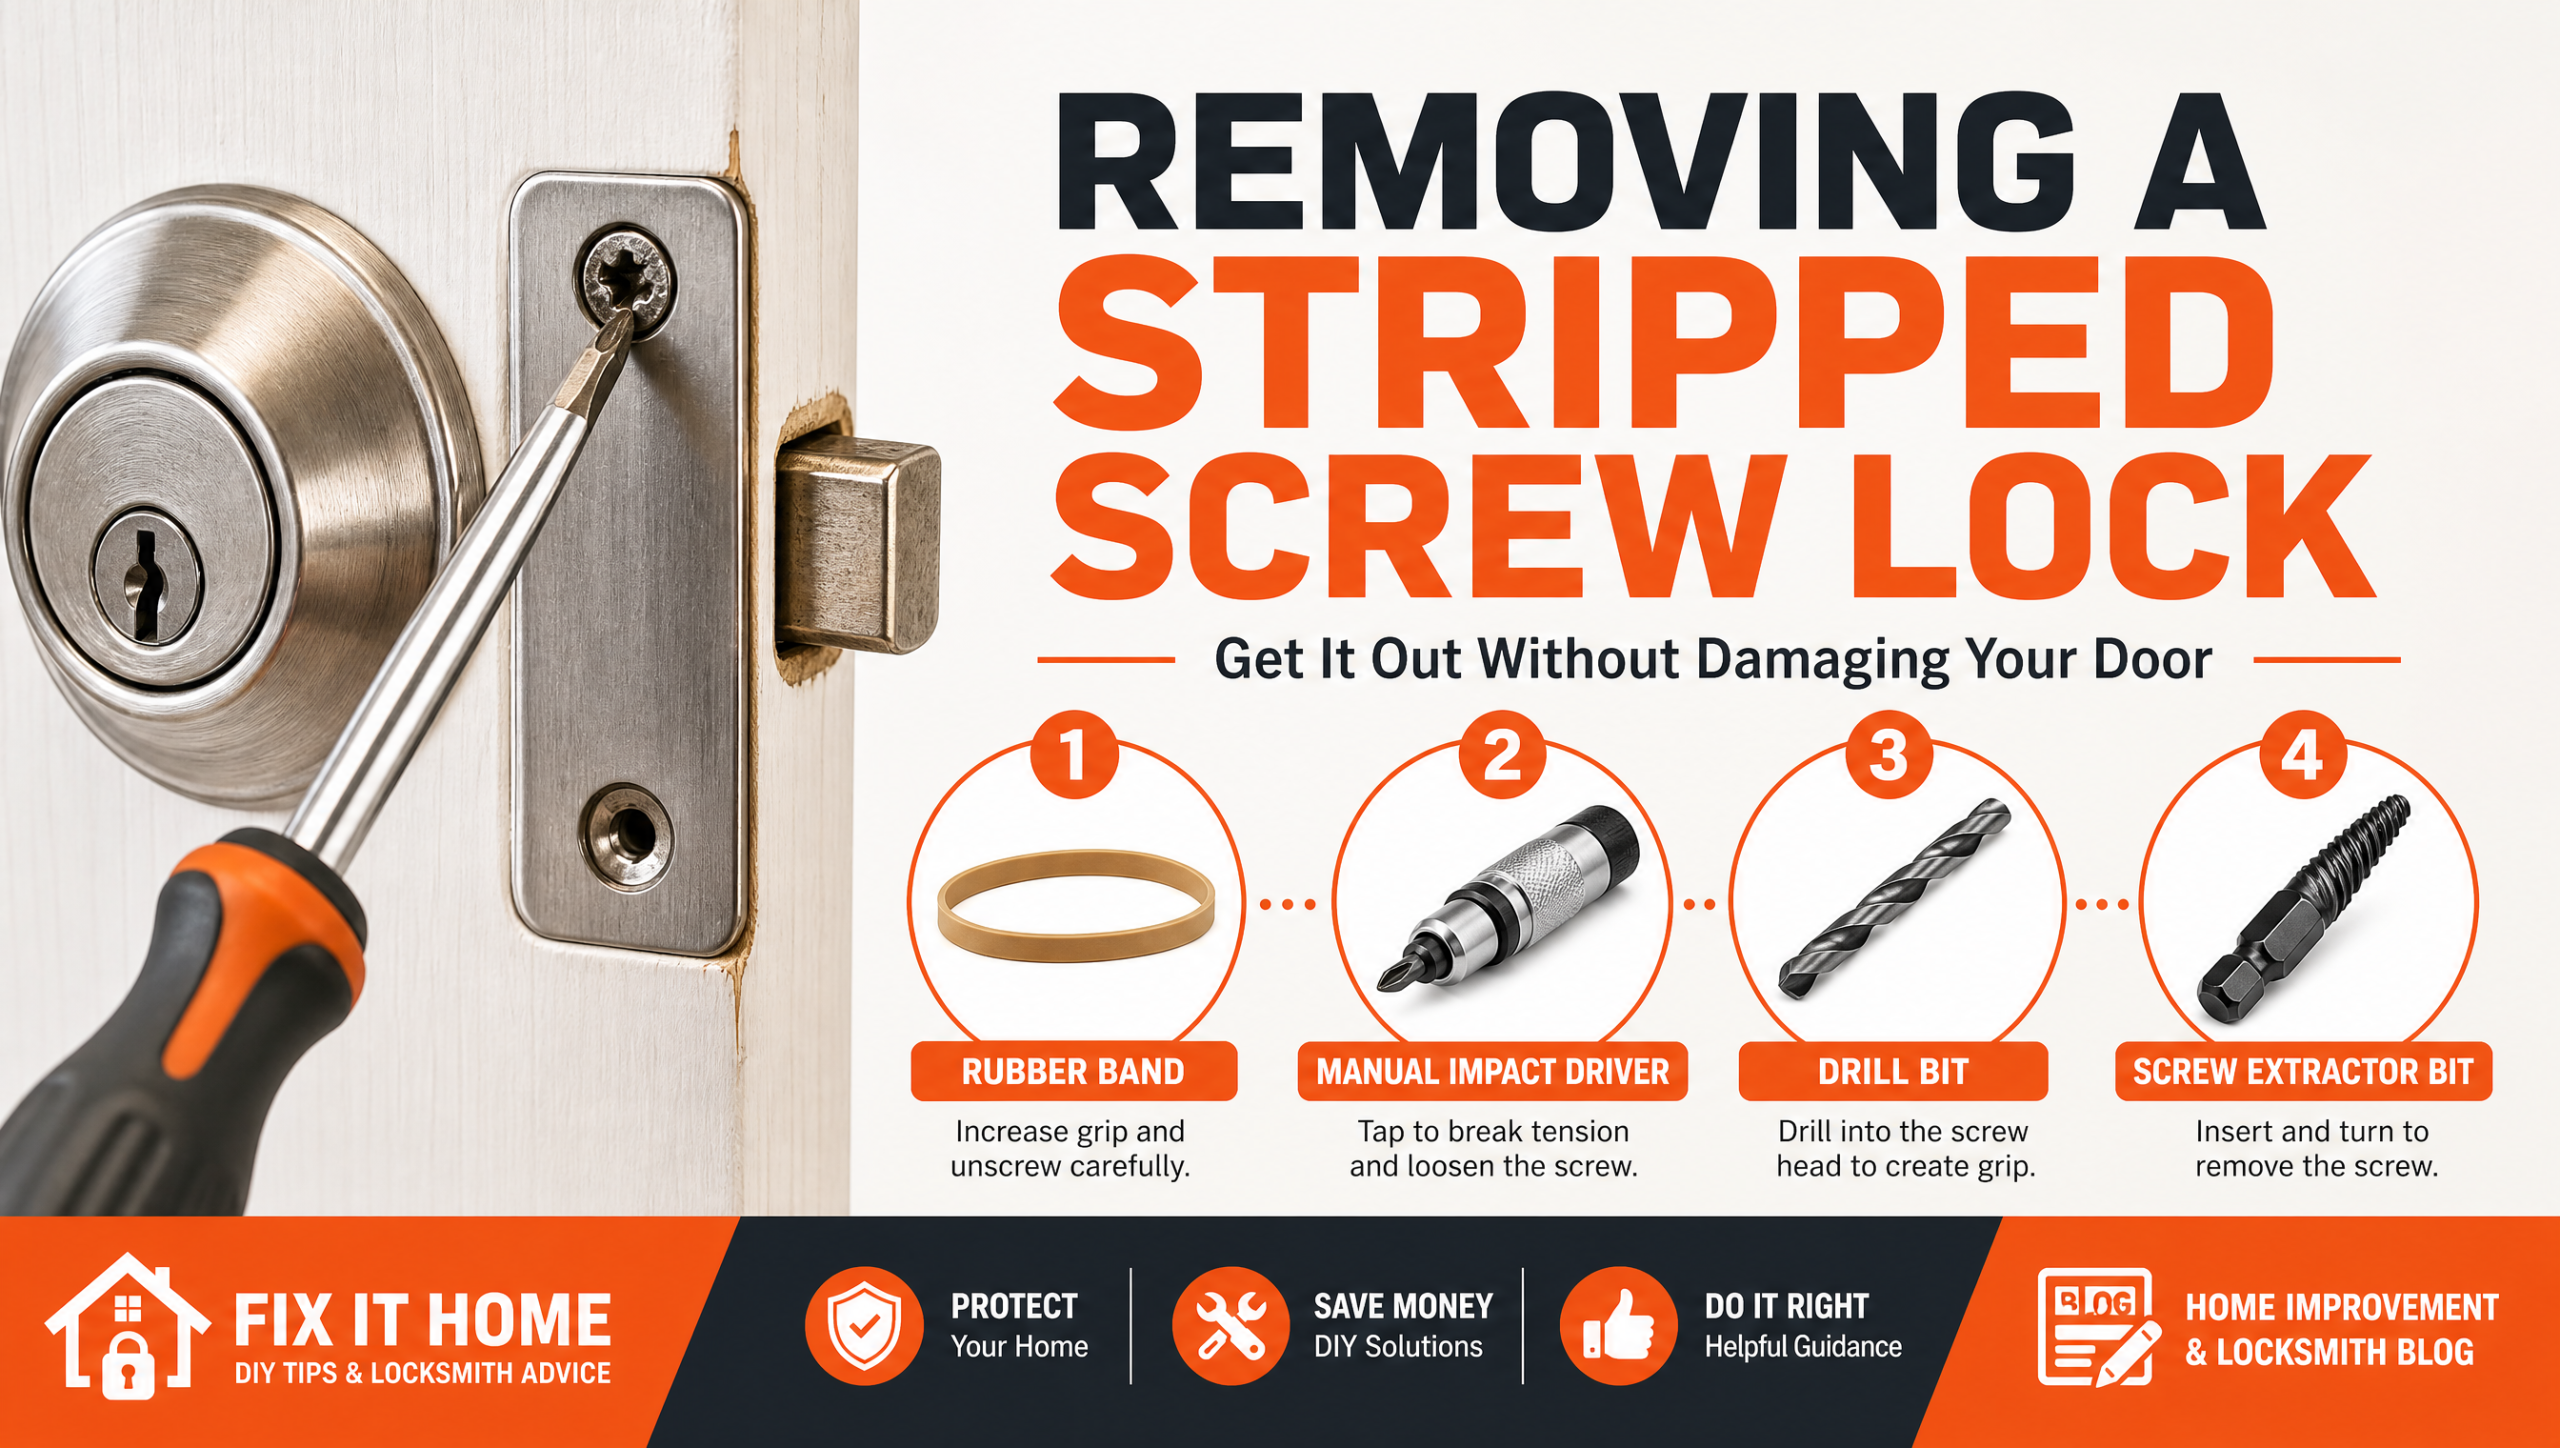
Infographic banner showing tools and steps for removing a stripped screw from a door lock

Removing a Stripped Screw Lock: How to Get It Out Without Damaging Your Door

A screwdriver that spins uselessly inside a rounded-out screw head is one of the most frustrating problems a homeowner runs into when a deadbolt or door handle needs attention. The fastener will not back out, the head is chewed flat, and forcing it harder only risks gouging the door or cracking the lock housing. The good news is that with the right grip, the correct bit, and a steady hand, a stripped fastener almost always comes free without harming the hardware around it. Below, our Mesa team walks through the exact field methods we trust, so read on before you reach for a power drill.

Removing a stripped screw lock comes down to restoring grip on a rounded head — a rubber band for traction, a manual impact driver, a left-handed drill bit, or a screw-extractor set — and then backing the fastener out under control while shielding the lock face and the surrounding door from scratches and burrs.

Why Lock Screws Strip in the First Place

A stripped screw is rarely bad luck. It usually traces to a mismatched driver — a Phillips tip seated in a square or combination head — or to overtightening that rounds the cross slots. Residential hardware compounds the problem because many face screws are soft brass that deforms under modest force. Add the heat-and-dust cycles Mesa hardware endures, and a fastener that was snug at installation can seize against corroded threads. Each removal attempt with the wrong tool shaves a little more metal until the driver has nothing left to bite.

This matters for more than convenience. A loose or seized screw on a strike plate, a thumbturn lock, or a handleset undermines the alignment the bolt depends on, which weakens overall deadbolt security. If you are servicing entry hardware, our residential locksmith team in Mesa handles these repairs without sacrificing the door security you rely on every day.

The Tools That Actually Work

You do not need a workshop to free a stripped screw. A handful of low-impact methods solve most cases.

Grip and Traction Fixes

The simplest trick is a wide rubber band. Lay it flat over the damaged head, press your driver firmly into it, and turn with steady downward pressure. The rubber fills the worn slots and bites where bare steel slips. A dab of valve-grinding compound or even fine abrasive cleanser between bit and head does the same thing through grit.

Mechanical Removal

When traction is not enough, step up to mechanical leverage. A manual impact driver — a hand tool you strike with a mallet — converts a hammer blow into a sharp rotational twist that breaks a frozen fastener loose without chewing the head further. If the screw still refuses, a left-handed drill bit (one that cuts counterclockwise) often grabs and reverses the screw as it bores. The dedicated solution is a screw-extractor set, a tapered, reverse-threaded bit that digs into a pre-drilled pilot hole and winds the fastener out. For any screw head standing proud of the surface, locking pliers clamped tight to the shoulder give you direct turning force.

Step-by-Step Method for Removing a Stripped Screw Lock

Work through these stages in order and stop once one of them works.

  1. Clear and assess. Wipe the head clean, identify the original drive type, and confirm the screw is not painted or glued in place.
  2. Try traction first. Seat the rubber-band method with firm, slow pressure before anything more aggressive.
  3. Apply controlled force. Move to the manual impact driver, striking squarely so the bit stays centered.
  4. Drill if needed. Switch to a left-handed bit or extractor only after traction and impact fail, drilling a shallow pilot at low speed.
  5. Back it out and inspect. Once the screw turns, remove it by hand, then check the threads in the door or jamb for damage before reinstalling.

The comparison below outlines how we match each method to the situation in the field.

Removal Method How It Works Best Used When Risk to Lock & Door
Rubber band Fills worn slots to restore driver grip Head is lightly rounded Very low
Abrasive grit / valve compound Adds friction between bit and head Smooth, polished screw heads Very low
Manual impact driver Hammer blow becomes a sharp turning twist Screw is frozen but head is intact Low
Locking pliers / vise grips Clamps the shoulder for direct leverage Screw head stands proud of the surface Low
Left-handed drill bit Counterclockwise bit grabs and reverses screw Head is too worn for any driver Moderate
Screw-extractor set Reverse-threaded bit winds out a pilot-drilled screw Head is destroyed or recessed Moderate
Rotary-tool slot + flathead Cuts a fresh straight slot for a flat driver Accessible head with room to cut Moderate to high
Penetrating lubricant soak Breaks down corrosion binding the threads Corroded or weather-seized screws Very low
Professional extraction Specialty tools, thread inserts, replacement hardware Snapped, flush, or security-door screws Minimal under expert handling

Protecting the Lock and Door From Damage

The removal method matters less than the care you take around it. Mask the lock face and the door with painter’s tape so a slipped bit leaves no scratch, and cut a cardboard shield to catch metal shavings before they grind into the finish. Keep any drill at its lowest speed: high RPM overheats soft brass and widens the hole you are trying to save. Vacuum filings as you go, because loose grit works its way into the cylinder and can compromise the very deadbolt installation you are protecting. If a thread tears out, a slightly longer or larger-gauge replacement screw usually restores a solid bite without a full hardware swap.

Pro Tip From the Field

After more than a decade pulling seized fasteners out of Mesa door hardware, here is the lesson that saves the most locks: match the driver to the screw before the first turn, and let the tool do the work. Most strips we repair were created by a driver one size too small forced at an angle. We keep a magnetic, multi-bit driver on every truck and seat the bit fully before applying pressure, never at a tilt.

One more field habit — a single drop of penetrating lubricant worked into a corroded thread, then left to soak while you set up your tools, loosens far more screws than brute force ever will. The same patience we bring to rekeying locks applies here: small, deliberate moves protect the hardware, and that discipline is what keeps a repair from turning into a replacement. It is the same care we describe in our guide to removing a stubborn key retainer on a padlock.

When a Professional Locksmith Should Take Over

Some situations move past a DIY fix. A screw that has snapped flush, a stripped thread inside a metal jamb, a high-security cylinder, or a thumbturn lock that no longer seats squarely all call for a trained hand. A professional locksmith in Mesa carries extraction tools, thread inserts, and replacement hardware that a household toolbox does not, and we follow the workmanship standards published by the Builders Hardware Manufacturers Association and the Associated Locksmiths of America. Forcing a damaged fastener on a security door risks the alignment that protects your home, and a botched removal often turns a minor fix into a full hardware replacement. When the hardware is already worn, our team can advise on a clean high-security lock and key upgrade rather than nursing a failing assembly.

Frequently Asked Questions

What is the easiest way to start removing a stripped screw lock?
Begin with the lowest-risk method: lay a wide rubber band over the damaged head, press your driver in firmly, and turn with steady downward pressure. The rubber fills the worn slots and restores enough grip to free a lightly rounded screw without any drilling.
Will drilling out a stripped screw damage my lock?
It can if done carelessly. Mask the lock face with painter’s tape, run the drill at its lowest speed to avoid overheating soft brass, and use a shield to catch metal shavings. Drilling should be a later step, used only after traction and impact methods fail.
Why do screws on door locks strip so often?
Most face screws on residential hardware are soft brass, and a mismatched or undersized driver rounds the head with little effort. Overtightening and corrosion from heat and humidity cycles make the threads seize, so each attempt with the wrong tool shaves away a little more metal.
Does a stripped screw affect my deadbolt security?
Yes. A loose or seized screw on a strike plate, handleset, or thumbturn lock throws off the alignment the bolt depends on. That play weakens how the deadbolt holds in the frame, which is why a stripped fastener on entry hardware is always worth correcting.
What tool removes a screw with a completely destroyed head?
A screw-extractor set is the dedicated solution. You drill a small pilot hole into the head, then thread the reverse-cut extractor bit in until it grabs and winds the fastener out. A left-handed drill bit often achieves the same result in one step on softer screws.
When should I call a professional locksmith instead?
Call a professional when a screw has snapped flush, the thread has torn out of a metal jamb, or the hardware is a high-security cylinder. A trained locksmith has extraction tools, thread inserts, and replacement parts that protect the alignment and home safety of a security door.

Keep Your Mesa Door Hardware Solid and Secure

A stripped screw looks like a small annoyance, yet it sits at the exact point where your hardware meets your door — the difference between a bolt that holds and one that rattles loose. The methods above free most fasteners without a mark, and the right follow-up keeps your home safety intact. If a screw has you stuck, or you would simply like a trained set of eyes on your entry hardware, let our certified technicians audit your doors and reinforce every weak point. You can learn more about our team, browse our full residential locksmith services, and reach out through our contact page to schedule a security audit or hardware installation. Find us and read verified reviews on our Google Business listing, then call Locksmith Near Me in Mesa to protect the door that protects everything behind it.
Rekeying a lock at home with DIY kit versus professional Mesa locksmith

Can You Rekey Your Own Locks? The Risks and Rewards of DIY Kits

Many Mesa homeowners discover an uncomfortable truth after moving into a new property or losing a key: too many people may still hold a working copy. Previous tenants, contractors, real estate agents, and even old roommates can keep access long after the situation has changed. Rekeying a lock at home is the most direct way to retire those old keys without replacing the entire hardware. In this guide, we explain how DIY rekey kits actually work, where they shine, where they fail, and when calling a professional locksmith in Mesa is the smarter call. Keep reading to make an informed decision before you pick up a screwdriver.

What Rekeying Actually Means

Rekeying does not replace your lock. It changes the internal pin stack inside the cylinder so the old key no longer turns it, and a new key takes over. As licensed locksmiths serving Mesa and the East Valley, we rekey hundreds of cylinders every year — from Schlage and Kwikset residential pin tumblers to higher-security deadbolts on commercial frames. Our residential lock rekey service covers single-family homes, condos, and rental properties across the city.

The process sounds straightforward: remove the lock, dismantle the cylinder, swap the bottom pins to match a new key bitting, reassemble, and verify the action. The reality depends on the cylinder design, the brand, and your tolerance for finicky mechanical work on small spring-loaded parts.

How DIY Rekey Kits Work

Rekeying a lock at home with DIY kit versus professional Mesa locksmith

Most consumer kits target one ecosystem — typically Kwikset SmartKey or a generic Schlage-compatible pin set. SmartKey uses a learn tool and a working key, which makes it the easiest entry point for an absolute beginner. Traditional pin-tumbler kits require sorting tiny bottom pins by height, dropping them into chambers without losing springs, and aligning the plug perfectly before reinstalling the cylinder back into the door.

A standard kit usually includes a plug follower, a key gauge, small tweezers, and labeled pins. What it does not include is the ability to recover from a mistake. One spring lost on a tile floor, one pin inserted upside down, and the lock will not function — or worse, it will function intermittently and refuse to open at the wrong moment, which is a real home safety concern. When that happens, our emergency home lockout service is the most common follow-up call we receive after a failed DIY attempt.

DIY vs Professional Rekey: A Practical Comparison

For homeowners with a single Kwikset SmartKey deadbolt and a steady hand, the DIY route can work. For households with multiple entry points, mixed brands, or a thumbturn lock that has weathered several Mesa summers, a professional rekey produces a cleaner, more durable result. The full comparison appears in the table below. If your hardware is already showing wear, our deadbolt installation and replacement service is often a better investment than rekeying a fatigued cylinder.

Factor DIY Rekey Kit Professional Locksmith
Skill required Moderate to high Trained and licensed
Compatible brands Usually one ecosystem All major manufacturers
Bump and pick resistance Standard pins only Upgraded pin options available
Risk of cylinder damage Real and common Minimal under proper handling
Master key setups Not supported Fully supported
Higher-security cylinders Not supported Supported (Medeco, Mul-T-Lock, ASSA)
Code-cut replacement keys Not included Cut on site to bitting code
Documentation for HOA / insurance None Service receipt provided
Warranty on workmanship None Yes

Where DIY Kits Often Fail

In our shop we routinely rebuild locks that homeowners attempted to rekey themselves. The pattern repeats:

  • Wrong brand kit. A Kwikset SmartKey kit will not rekey a Schlage. A Schlage pin set will not rekey a Yale, Baldwin, or Emtek estate cylinder.
  • Worn cylinders. Mesa’s heat cycles dry out internal lubricants. A cylinder that already binds will not tolerate disassembly without further damage to the plug or tailpiece.
  • Mixed pin heights. Pins look identical at a glance. A misread bitting code creates a lock that turns with the new key only sometimes — a serious deadbolt security weakness.
  • Lost springs and top pins. Small parts disappear into carpet and floor vents. Without the full pin stack, the lock simply cannot be rebuilt at home.
  • High-security cylinders. Medeco, Mul-T-Lock, ASSA, and similar brands use sidebars, telescoping pins, and restricted keyways that consumer kits do not address. These belong to our high-security lock installation category and require manufacturer-certified technicians.

Pro Tip From the Field

After more than a decade rekeying residential and commercial locks across Mesa, our most consistent advice is this: before you open the cylinder, test the lock with the existing key ten times in a row, slowly. If the key catches, hesitates, or requires lifting the door to turn, the cylinder needs more than a rekey — it needs cleaning, lubrication with a dry graphite-based product, and possibly replacement of the strike or latch.

Rekeying a worn lock simply transfers the wear to a new key. We see this regularly on doors that have been through multiple monsoon seasons without service.

For a thumbturn lock interior, also check the spindle. A loose spindle on the inside of a deadbolt is a home safety issue that no amount of rekeying will solve, and it is one of the most overlooked items in a home security audit in Mesa. The performance standards published by BHMA and the certification body ALOA define how a residential deadbolt should behave, and a professional inspection catches what a DIY kit cannot.

When to Call a Professional Locksmith

Some scenarios are not DIY territory:

  • You just bought a home and want every exterior door rekeyed to a single key
  • You have mixed-brand hardware (Kwikset front, Schlage back, Baldwin patio)
  • Your insurance carrier or HOA requires a documented rekey by a licensed technician
  • You want a higher pin count, anti-bump pins, or a restricted keyway
  • Your deadbolt is BHMA Grade 1 or Grade 2 and the manufacturer warranty matters to you
  • You manage rentals or commercial property and need a master key system configured across multiple doors
  • You also need key duplication and code-cut keys made on site after the rekey is complete

Our team works under ALOA standards and follows residential security guidance published by the DOJ Office of Community Oriented Policing Services and the FBI Uniform Crime Reporting program, which consistently identifies entry-door hardware as the primary residential burglary point in the United States.

If you are weighing a rekey, a hardware upgrade, or a full residential lock replacement, a licensed Mesa locksmith can audit every entry point in a single visit. You can also explore our complete residential locksmith services in Mesa or review our guide to home lock replacement and security upgrades for related information. Considering a hardware upgrade? Take a look at our smart lock installation options before committing to traditional pin-tumbler hardware.

Final Thoughts on Rekeying a Lock at Home

DIY kits have a legitimate place. For a single Kwikset SmartKey deadbolt and a confident hand, they save a service visit. For everything else — multiple doors, mixed brands, thumbturn lock issues, higher-security cylinders, or any sign of mechanical wear — a professional rekey protects your investment and reinforces your overall home safety.

Schedule a residential rekey or full security audit with our licensed Mesa locksmith team and find our shop on Google Maps. We will inspect every entry point, recommend the correct pin configuration, and rekey the entire home to a single key when that is the goal. To request a visit or talk to a technician about your specific door hardware, contact our Mesa locksmith team directly.

Frequently Asked Questions

Is rekeying a lock at home as secure as installing a new lock?
Yes, when performed correctly. A rekey changes the bitting that operates the cylinder, so old keys no longer work. Security depends on the existing hardware grade — a worn or low-grade deadbolt should be upgraded rather than rekeyed.
Can a DIY kit rekey any brand of lock?
No. Most consumer kits work only with one brand or one keyway. Kwikset SmartKey kits will not work on Schlage, and standard Schlage pin sets will not service Yale, Baldwin, or any high-security cylinder.
Will rekeying fix a sticky deadbolt?
Rarely. A sticky deadbolt usually points to internal wear, dry lubrication, or a misaligned strike plate. Rekeying without addressing the underlying issue transfers the same friction to a new key. A professional locksmith will inspect the cylinder, latch, strike, and frame before recommending a fix.
Is a thumbturn lock harder to rekey than a keyed deadbolt?
The exterior cylinder rekeys the same way. The interior thumbturn does not contain pins and only needs inspection of the spindle and torque blade. If the thumbturn is loose or rotates without engaging the bolt, rekeying alone will not restore deadbolt security.
Can a locksmith rekey every lock in my home to one key?
Yes. Even when brands are mixed, a professional locksmith can either rekey compatible cylinders to a single bitting or replace incompatible hardware so the entire home opens with one key. This is a common request after a real estate purchase.
When should I replace a lock instead of rekeying it?
Replace the lock when the hardware is below BHMA Grade 2, when the cylinder shows visible corrosion or pin wear, when the latch and bolt no longer line up cleanly with the strike, or when you want to upgrade to anti-bump or restricted-keyway protection. Otherwise, a rekey is the more efficient option.

Rekeying a Lock at Home: The Final Verdict for Mesa Homeowners

Choosing between a DIY rekey kit and a professional service comes down to one honest question: how much risk are you comfortable absorbing on the door that protects your family? A SmartKey deadbolt on a single front door is a manageable weekend project for the patient homeowner. A whole-home rekey across mixed Kwikset, Schlage, and Baldwin hardware — or a thumbturn lock that has spent several Mesa summers exposed to dust and heat — is a different conversation entirely.

If you are still in the research phase, our companion guide on how to upgrade your home deadbolt to BHMA Grade 1 walks through the hardware decisions that pair naturally with a fresh rekey. Many of the homeowners who call us for a rekey end up combining it with a small hardware upgrade in the same visit, which is why our technicians always carry a stocked van.

For a complete entry-point inspection, a master key configuration, or a documented rekey for your insurance file, our Mesa locksmith team is ready to help. Visit our shop on Google Maps, see what neighbors across Mesa are saying about our work, and contact a licensed technician to schedule your residential rekey or deadbolt security audit. Your locks are the most-used piece of security hardware in the home — they deserve a job done right.

Sliding door security locks

Sliding Door Security Locks: How to Secure Your Sliding Glass Doors Effectively

Here in Mesa, we have seen a recurring pattern during home security audits: beautiful patio sliders that look solid but are the easiest entry point in the entire house. The factory latch that comes with most sliding glass doors is designed for convenience, not protection, and experienced burglars know it. The good news is that upgrading to proper sliding door security locks is one of the most affordable and effective hardening projects any homeowner can do, and in this guide we will walk you through exactly how to do it right. Keep reading to learn what actually works, what is sold as security but is not, and how our team approaches these installations across the East Valley.

Why Sliding Glass Doors Are the Weakest Link in Your Home

After more than a decade working as a professional locksmith in Arizona, we can confirm that patio sliders are involved in a disproportionate number of residential break-ins. According to the FBI Uniform Crime Reporting data, a significant percentage of home burglaries involve forced entry through secondary access points rather than front doors. The standard latch built into most sliders is a small hook-style mechanism that engages a plastic or thin metal catch on the frame. A determined intruder can defeat it with a flathead screwdriver, a shim, or by simply lifting the door panel off its track, which is a known vulnerability when the rollers are not properly adjusted.

Most homeowners do not realize that the glass itself is rarely the target. Breaking glass is loud, leaves evidence, and causes injuries. Intruders prefer silent entry, and the standard slider latch offers exactly that. During our residential security consultations, we frequently find sliders that can be opened from the outside in under thirty seconds without any special tools.

This is why proper home safety planning has to address the patio door as a distinct category, not as an afterthought. A front door with a high-grade deadbolt security system means very little if the back slider can be lifted off its track in seconds. Guidance published by the U.S. Department of Justice Office of Community Oriented Policing Services consistently emphasizes layered residential defense, and sliding doors are a well-documented weak point in that layered approach.

Sliding Door Security Lock Comparison

Lock Type Security Level Ease of Use Best For
Loop Thumbturn Lock High Keyless inside Families, primary defense
Foot / Floor Bolt High Foot operated Secondary layer
Keyed Patio Lock High Key required Non-egress doors only
Track Security Bar Medium Place and remove Budget layered defense
Anti-Lift Device Medium Set and forget Closing lift vulnerability
Factory Latch Only Low Standard Not recommended alone


The Real Vulnerabilities: What We See on Every Inspection

[IMAGE: Side-by-side comparison of a standard sliding door factory latch versus a reinforced loop-style thumbturn lock installed at the top of the frame]

A photorealistic close-up photograph showing two sliding glass door locks side by side on residential patio doors, with warm Arizona afternoon lighting highlighting the metallic finish of both hardware pieces. The image clearly contrasts the thin factory latch on the left with a robust reinforced security lock mounted at the top of the door frame on the right.

When our technicians inspect a patio slider, we look at four specific failure points, and understanding them will help you evaluate your own door at home.

The Factory Latch Hook

The hook-and-catch mechanism is the first problem. It is not a lock in the security sense, it is a convenience latch. It holds the door closed against wind, but it provides almost no resistance against prying or shimming. We recommend treating it as a secondary feature at best and never as your primary defense.

The Lift-Out Vulnerability

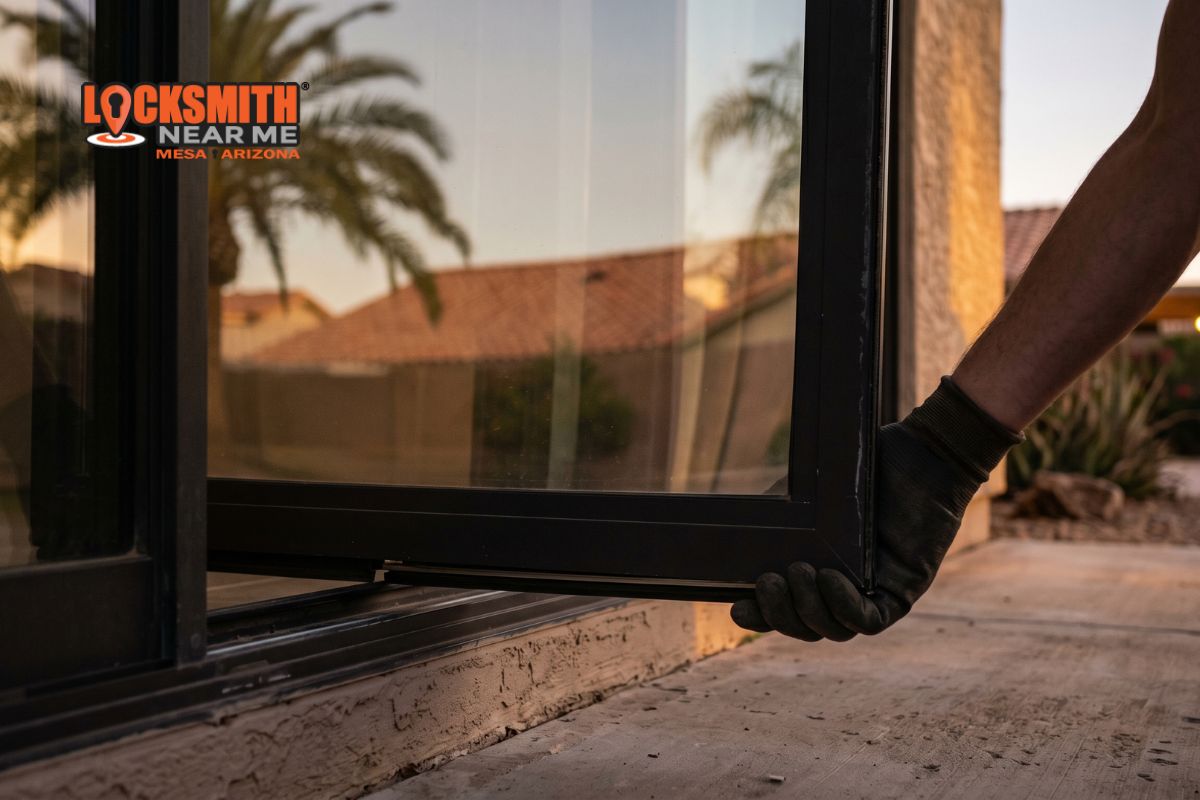
Sliding doors hang on rollers that ride on a bottom track. If there is enough vertical play in the frame, an intruder can lift the movable panel up and out of the track entirely, bypassing the latch completely. We have personally demonstrated this during client walkthroughs using nothing but our hands. Anti-lift hardware or properly adjusted rollers eliminate this risk. The Associated Locksmiths of America regularly publishes guidance on sliding door hardware standards, and lift resistance is consistently listed as a core requirement.

The Track Itself

An empty track is an invitation. Even a simple wooden dowel cut to length can prevent the door from sliding open, but most homeowners either do not install one or use a piece that is too short, leaving several inches of play. That play is all an intruder needs to reach in and defeat other locks.

The Strike Plate and Frame

The small metal piece the latch catches into is usually attached with short screws into soft aluminum or vinyl framing. Under real force, it tears out. Reinforcing this point is one of the upgrades our team regularly performs on Mesa homes.

Sliding Door Security Locks: What Actually Works

Based on years of field installations across Mesa, Gilbert, Tempe, and Chandler, here is our honest assessment of the options available to homeowners, starting with the most effective.

Loop-Style Thumbturn Locks

A thumbturn lock installed at the top or bottom of the door frame is, in our experience, the single best upgrade for a sliding glass door. It mounts to the stationary frame and loops over the edge of the movable panel, preventing both sliding and lifting. It is visible from outside, which is itself a deterrent, and it can be engaged or disengaged from the inside without a key, which matters for fire egress under NFPA life safety standards.

Foot Locks and Floor Bolts

These are mounted at the bottom of the movable panel and drop a bolt into the track. They are effective, relatively affordable, and easy to operate. We install them as a secondary layer on top of a thumbturn, not as a standalone solution.

Keyed Patio Door Locks

A keyed lock mounted through the frame offers strong resistance but requires a key for exit, which we generally advise against for any door that could be part of an emergency evacuation route. If you choose this route, please discuss code compliance with a licensed locksmith familiar with Arizona Registrar of Contractors requirements.

Security Bars and Rods

A properly sized bar in the track is a legitimate layer of defense and costs very little. The key word is properly sized. We see too many bars cut several inches too short, which makes them decorative rather than protective. Our installation team will cut and fit one to the exact dimensions of your door.

Anti-Lift Devices

These are small brackets or pins that prevent the movable panel from being raised out of its track. They are inexpensive, nearly invisible once installed, and close one of the most common bypass methods we see.

Our Hands-On Installation Process

When homeowners call our Mesa locksmith team for a patio door upgrade, we follow a consistent process refined over thousands of installations. First, we measure the door frame, assess the roller condition, and identify whether the frame material will hold standard fasteners or needs reinforcement. Aluminum frames common in Arizona construction require specific screw types to prevent the hardware from loosening over time in our heat cycles, something the National Weather Service Phoenix office documents as one of the most extreme thermal environments in the country.

Next, we discuss your household routine. A family with small children has different needs than a retired couple or a short-term rental property. The right lock is the one that you will actually use every day, and that choice depends on who lives in the home.

Installation itself typically involves drilling pilot holes, securing the lock body to the stationary frame, verifying alignment through multiple open-and-close cycles, and testing the lift resistance. Our technicians carry the tooling to address underlying issues like worn rollers or a bent track, which are often the real reason a door feels insecure in the first place.

We stand behind every installation, and our work is backed by the consistent five-star feedback our customers have shared about our East Valley service. You can also verify our standing through public business records maintained by the City of Mesa.

Pro Tip: The Test We Do on Every Job

Before we leave any sliding door installation, we do a simple test that you can do yourself right now. With the door locked using whatever hardware you currently have, stand outside and try to lift the movable panel straight up. If it moves more than a quarter inch vertically, your rollers or your anti-lift hardware need attention, regardless of how strong your main lock looks. This single check tells us more about real-world security than any sales brochure, and it is the reason we always verify lift resistance rather than just latch strength. If the panel lifts, the latch does not matter.

Credentials, Training, and Why They Matter

Our Mesa locksmith team has built its reputation on proper training, continuing education, and strict adherence to industry safety standards published by organizations like ASSA ABLOY and the Builders Hardware Manufacturers Association. Every technician on our roster has completed supervised field training before working independently, and we maintain current knowledge of lock manufacturer specifications through ongoing coursework. We are fully insured, which matters when you are inviting someone to drill into your home, and we document every job we perform.

Transparency is part of how we work. Before we touch a door, we explain what we are going to do, what hardware we recommend, and why. If a simpler fix will solve the problem, we say so, and our technicians are trained to give honest assessments rather than push unnecessary upgrades. Consumer protection guidance from the Federal Trade Commission recommends exactly this kind of upfront disclosure, and we consider it a baseline standard rather than a selling point.

Frequently Asked Questions About Sliding Door Security Locks

Are sliding glass doors really more vulnerable than regular doors?
Yes, in most residential homes the patio slider is the weakest entry point. The factory latch is a convenience feature, not a security lock, and the door itself can often be lifted out of its track. Upgrading to a proper sliding door security lock closes both vulnerabilities at once.
Can I install a sliding door lock myself?
Some options like track bars and anti-lift pins are homeowner-friendly. However, thumbturn locks and foot bolts require precise alignment and correct fastener selection for aluminum frames. If the installation is not plumb, the lock will fail under stress. For long-term performance we recommend a professional installation.
What is the best lock for a sliding glass door?
In our hands-on experience across Mesa, a loop-style thumbturn lock mounted at the top of the frame is the strongest single upgrade. It prevents sliding and lifting simultaneously, requires no key from the inside for safe egress, and provides visible deterrence from outside.
Will a new lock damage my sliding door frame?
When installed correctly by a trained technician, no. We pre-drill pilot holes to manufacturer specifications and use fasteners rated for the frame material. Poor installation is what damages frames, which is why we verify alignment and torque on every job.
Do sliding door security locks work with pet doors?
Yes, we regularly install security hardware on sliders that include integrated pet door inserts. The lock is mounted on the stationary frame above or below the insert, so the pet door continues to function normally while the slider itself is properly secured.
How do I know if my current sliding door is secure enough?
Try the lift test we described in the Pro Tip section. With the door locked, attempt to raise the panel vertically from outside. If it moves more than a quarter inch, the door is not secure regardless of the latch. A professional security audit will identify every weak point and recommend targeted fixes.

Securing More Than a Door: A Thought on Layered Protection

A sliding door upgrade is a meaningful step, but it works best as part of a layered approach to residential security. If you found this guide helpful, you may also want to read our related piece on rekeying versus replacing locks when you move into a new home in the East Valley. The principle is the same in both cases: the goal is not to create an impenetrable fortress, because no such thing exists, but to make your home a harder, slower, and louder target than the alternatives on your block. Good sliding door security locks accomplish exactly that, and they do it without changing the way you use your patio or enjoy your backyard. When you are ready to take the next step, our team is here to walk you through what your specific door needs, install it correctly the first time, and verify every point of resistance before we consider the job done. Visit our Google Maps listing for locksmith near me Mesa to see where we are located, read recent customer reviews from your neighbors, and get directions to our service area. You can also contact our Mesa locksmith team directly or stop by our local listing to discuss a security audit for your home. Your patio door does not have to be your weakest link, and we are ready to help you fix it today.